First stage of column shuttering

First stage column shuttering First stage column shuttering

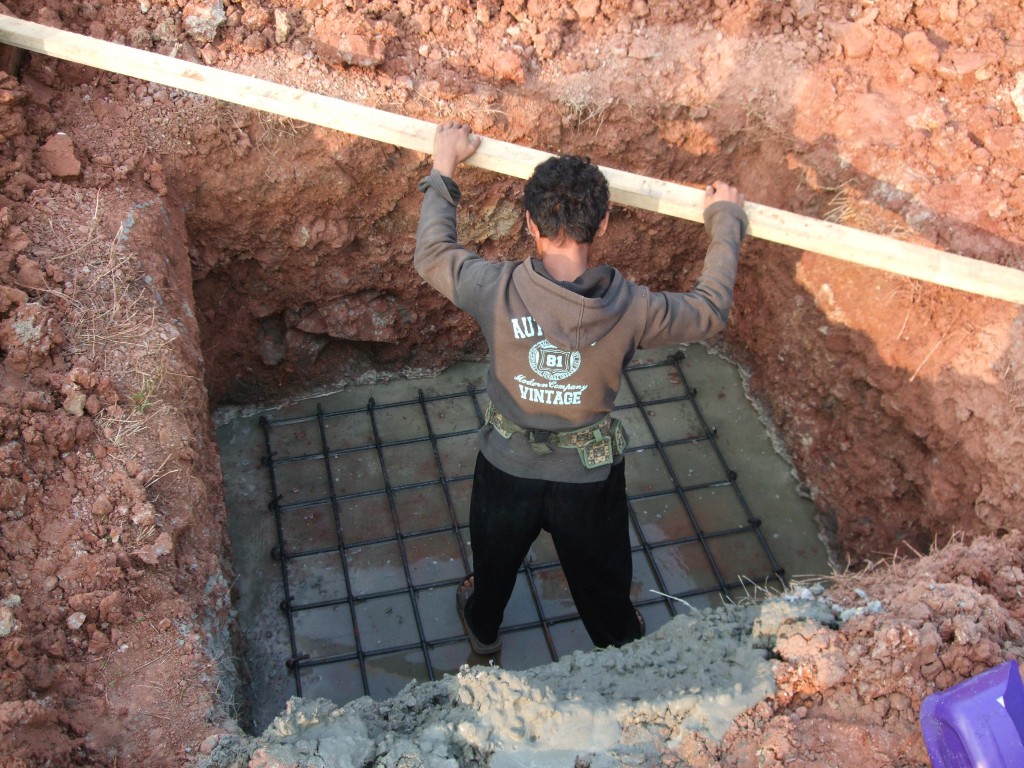
Today we took delivery of more materials for the next stage of the build.  Shutting was also fitted around the steel re-enforcement columns ready for concrete to be poured tomorrow.  The shuttering comes to a level lower than the eventual level of the ground floor.  Once the concrete has set, the steel re-enforcement beam structures will be attached to the steel column structures, and the concrete beams poured.

Construction starts...

Today is the Chinese New Year and in Thai culture is considered to be a lucky day to begin the actual construction of the house.  So with the holes having been dug, we were ready to erect the first two steel re-enforcing columns.

Cutting corners is a common practice in Thailand, with developers and builders keen to reduce construction costs, often at the expense of the structural integrity of the building.  It is often in the places that can not be seen that these corners are cut, but invariably, these are the worst possible places to try to save on a few Baht such as with the foundations.  We are ensuring that at every stage of the build we are using only the best quality materials and also that we are adhering to the highest possible international construction standards.

Steel re-enforcing base of first column


Here you can see the first of the steel re-enfored footings being laid.  These are large in area (1.7m x 1.7m), deep (1.4m), and laid on two layers, one of sand (10cm) and one of concrete (10cm).  Aside from using smaller shallower footings, the steel re-enforcment is often laid directly onto bare earth, or at best a layer of gravel, but this can lead to problems later with moisture able to seep in and corrode the steel structure.

Attaching the Column Re-enforcement to the Base


With the base in place, the column re-enforcement structure is lowered into place and attached to the base.  Another Thai tradition is to throw in some coins to be set within the concrete base for good luck.

Concrete pour into the base of the column support


Concrete is then poured in to the base, in this case to a depth of 30cm.

The first two column structures


Here you can see the first two column structures held up by temporary wooden supports.  In addition to placing coins within the foundations, baskets containing further offerings are attached to the columns as part of the same Thai - Buddhist tradition.

Digging footings & connecting electricity

Digging Footings & Electricity Hook Up Digging Footings, Connecting Electricity, taking delivery of equipment

A temporary electricity meter was connected in order to provide power during the initial build phase.  The electricity company charges double the standard rate for electricity from this type of meter.  It will be replaced with standard meter once a circuit breaker box and wiring has been installed in the semi-finished house.

Also today, work began on digging the holes for the foundations and we took delivery of the equipment and materials that will be required over the coming days.

Staking out the land

Staking out the plot of land in Nong Khai Staking out the land and setting datum level

Today, with the land cleared and the plans finalised, the area was staked out and a datum level established from which to ensure the correct level of all components of the structure.  The position of the structural supporting columns was marked out, then following this the placement of the holes to be dug for the footings of the building.

Designing the right home for the plot

As the architect for this project, I gave a lot of consideration to the size and position of the land and tried to come up with design that would not only just look great, but also would make the best possible use of the land.  One criticism that I have of most of the other houses in Thip Thani is that being one storey, they are very spread out over their respective plots of land resulting in very small gardens.  Another consequence of this is that the houses are very close to one another which results in heat traps between the homes with poor air circulation.

I have designed a two storey home to reduce the building's footprint and maximise both the available garden area and the distance to neighbouring properties. The building plan is L-shaped in form, built relatively close to the front of the land, creating a large and private rear garden area.

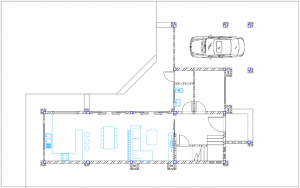
Thip Thani House - Ground Floor Plan Ground Floor Plan

On the ground floor there is a covered parking area and a two storey high entrance hall with staircase to the second floor.  Leading off the entrance hall is an office (or third bedroom) at the front of the property, a bathroom and then the large living area at the rear.  This living area takes the form of a long room with open plan living, dining and kitchen area. This living area has two very large full heigh windows / sliding doors leading out to the large garden and decking.

THip Thani House - Second Floor Plan Second Floor Plan

The second floor covers a smaller area than the ground floor providing two large en-suite bedrooms each with its own large balcony, one at the front and one at the rear.  The bedrooms are of a generous size and include large built in wardrobes.  The bathrooms are also of a large size.

The positioning of the building on the land also provides much needed shade from the sun to the large rear garden.

Now that a plan has been established, the next step for me is to generate all of the other drawings and 3-D models required to provide to our Structural Engineer in order to carry out the calculations required in order to ensure the structural integrity of the finished home.  The architectural plans, along with the structural calculations & plans will then be submitted to the local planning department for approval.

Clearing the land ready for construction

Clearing the plot of land in Thip Thani, Nong Khai Clearing our plot of land

Often, when building in Thailand, the land is reclaimed farm land and has previously not been built on.  In this case, it is necessary to build up the level of the land with earth.  This is done for two reasons. Firstly, much farm land was previously used for rice cultivation and as such is prone to flooding during the rainy season, so raising the level is advantageous.  Secondly, the weight of the earth stabilises the land beneath, to make a stable base for the foundations/footings.  Once the level of land has been built up, the earth should be left to sit for several months before building can start in order to allow the land to settle (Unless piles or bore holes are to be used).

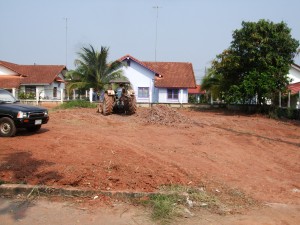
The land that we have bought is a part of Thip Thani and had been levelled at the time the rest of the village had been built, some 15 years ago, so it was unnecessary to build up the level or leave the land to settle, meaning that we could begin construction immediately.

The first step, was to clear the the land of vegetation, then level the land to create a flat plot of land on which to build.  We did however require about four trucks of earth in order to fill various  holes in the land.

Buying Land In Nong Khai

Land in Thip Thani, Nong Khai Our chosen plot of land in Thip Thani, Nong Khai

As a foreigner living in Thailand, you often find things are not done quite the way that you are used to, and buying land is no exception.  The first hurdle is finding available land.  Whilst there are some estate agents, they are few and far between.  Property is often 'advertised' solely by word of mouth.  If a third party brings a buyer to a seller, then it is normal for the seller to pay that third party a commission of 3%.  It is this commission that makes the system work.

Even so, you still have to find the piece of land that is right for your project.  We spent quite some time choosing the right spot, but decided on a plot in Thip Thani, Nong Khai.  Thip Thani is a small village of about 80 semi-western style properties about 5km outside of Nong Khai Town, on the edge of the larger Thai village of Na Khlong.  I say 'semi-western style', because whilst the properties in Thip Thani are less like traditional local Thai houses, they are also not quite built to the same specifications as one may be used to say, back in England, where I am from.  When the house is complete, we will be offering it for either sale or rent. Whilst most expats in Thailand appreciate and enjoy Thai culture, it is true to say that most also like to be a part of an expat community. As about 50% of Thip Thani homes are either owned or rented by expats, this was an ideal location for our fist property.

So, to the land.... You may be familiar with Acres, Hectares, and Square feet or Meters, but in Thailand, different units of area are used as follows:

1 TalangWa  =  4 s.qm

1 Ngan  =  100 TalangWa  (400 sq.m)

1 Rai  =  4  Ngan (1,600 sq.m)

Alhough not used here, 1 acre is equivalent to 2.5 Rai.

The land that we have chosen is 96 TalangWa (384 sq.m).

Once we had negotiated a price with the owner, we made an appointment at the Nong Khai land registry office where the land was transferred to our name on the "Shanote" paper or property deeds.   Payment to the seller was made at this time, and there was also a fee of 1,860THB for the name transfer.  Ordinarily, vacant land has "Shanote Posts" to mark the land boundaries, but there were none at on this land and so there was a further fee of 2,880THB for someone from the land registry office to come and measure and mark out the land boundaries.

The next step is to clear the land and design the house!

A new home building project & blog begins in Nong Khai

Welcome to our new blog!

Though Nong Khai Design is a relatively young company, we have found that our services have been heavily in demand.  So much so, in fact that we have barely had time to develop our own website, as you will have noticed from the 'under construction' banners.  To address this, we have decided to add this blog to our site in order to document some of the projects we are working on.

Ordinarily, Nong Khai Design would be commissioned by a third party to undertake a project for which we would be provided with a design brief.  However, we have recently decided to branch out into the property development business ourselves.  There are issues regarding privacy and blogging about clients' projects, so this blog will focus on our own project to build homes for subsequent sale or rental.

I will be documenting the progress of the build here on an almost daily basis.  I hope that through this you will gain an understanding of the construction process and may find it useful when planning your own building projects either in Nong Khai or elsewhere in Thailand.  I obviously also hope that it will give you an appreciation for the attention to detail and build quality that we care about so much at Nong Khai Design.